Thursday, October 31, 2013

Round 'em up and brand 'em!

I dreaded this portion of the module because I needed to take a laser-cut wood model and kit-bash it, something I've never done.  The kit, the Quality Meat Stock Yard, is from N Scale Architect.  It was designed as a receiving pen for a slaughter house/meat processing center and not as a shipping point for cattle.  That's actually a major distinction, apparently, at least as far as the design is concerned. The classic cattle pen that I wanted need its chutes to be arranged differently so that once a cow is in the chute its got nowhere else to go but up and into the stock car.

Below is a photo that another modeler, Dwayne Ward, displayed on The Whistle Stop forum site. He constructed the kit as designed and reading his posts it seems he wasn't overjoyed with the final product. It looks great to me, though; he did a very good job.  You can see there are four ramps in the foreground.  In practice, the cattle would debark from the cars, down the ramps, and enter into four sorting pens.  From there the cattle are funneled into two chutes where they are then sorted into one of three larger pens.


You can see a couple of things in the above picture.  First, there are two large structures that I didn't want. These are storage barns.  I'll break up one of them later to use a portion of it in a different part of the module as a smaller hay barn, but for my purposes they're out of place attached to the stock yard.  The thing is, each structure serves as a wall at opposite ends of the pen.  Take them away, and the pens are open.  I needed to find enough fence within the kit to close off each of the open ends or find another fence source. Well, fences are hard to come by in N Scale and I wasn't going to buy a second kit at $45.  I tried building a four-rail fence using scale lumber, but failed miserably. Second, there are only two chutes, but four ramps.  Like I said, that might work for a receiving pen, but not for the classic stock yard that I wanted.

So I broke out the N Scale ruler and began measuring pieces.  The big problem I ran up against is that this model is "tab-and-slot" construction.  There is generally only one way to put it together (and have it work out well).  I decided to build my version using only two chutes.  That way I could keep the center portion of the stock yard intact and then take the remaining pieces and use them to construct the missing fence.  Here's the front view.


You can see that there is an entrance to the cattle yard on the far right side; a portion of fence funnels down to an open gate in the right hand pen.  Because the chute fences were designed with laser-cut gates to allow for movement between the pens, I didn't cut them out of the fence.  I didn't cut them apart, either, foregoing illustrating how they swing open.  With other cuts in the structure yet to come, I felt the yard needed the support of an unaltered fence.  After all, this model is made up of very thin micro-plywood, probably no thicker than my thumb nail; apply too much pressure and it all snaps.


In this shot above you can see where I made some other cuts.  I cut one of the chute fences on each side of the center pen at the last segment of fence then bent the cut piece toward the middle.  I took two of the unused gates to finish off the chute, although I did leave one of the gates open and will have cows entering the chute and at every stage along the way.  You can see the L and reverse L shape of the two chutes.  This is the way stock yards tend to work so that cattle are funneled into one of the chutes and pushed through to the ramp and the waiting dispatch car.  In fact, researching such things (as I've never been around cows in my life), I found that some modern stock yards actually use circular chutes.  I think that may cut down on the amount of real estate used; or it could help to keep the cows focused on only what is in front of them. It's a dangerous thing, moving cattle.  They spook very easily.  If they get nervous when in the chute they could panic and tear down the whole structure.


The chutes do have stations; that is, gates within the chute.  Cattle would be moved from station to station, with the gates opening and closing to manage the flow and loading of the animals, to segregate the cows in case something happens, and to complete several tasks.  One of these tasks would be weighing the animal. Another could be double-checking brands or ear-tags.  Today, the cows probably have bar codes.  But my stock yard is being used in the late '50s, so I don't have to worry about all of that newfangled nonsense.

This view from the back will show several things. The first is that I built a third ramp and set it aside. This is an extra one, not fully functional.  Looking at it close up, and from another angle, you'd see that the door is open and off its hinges. I wanted to model a ramp in disrepair. The next thing I did was to add gate supports. These are the tall fence posts with cross beams that rise above the chutes; they were fairly standard in the older cattle pens.  The ranch hands would use the supports to hold onto or throw a rope over to hold a cow in place.  The kit was too flat without them.  Luckily I had enough pieces left over to build them.

Another thing to look at are the posts.  The kit comes with posts lasered into the wood, but these are flat. There are also about 80 lasered bits of wood post halves in the kit that have self adhesive backing. These are very small and the adhesive does not grip very well.  You can see that I have put quite a lot of post halves on both the inside and the outside of the pens, though some of these posts are leaning a bit, or very crooked. I'm going to have to go through the structure and drop a little CA here and there after I do a bit of straightening up. These added posts give the model much needed texture.

Finally, I'm planning to put in kick rails along the chute fences and on both sides of the chutes. These rails would be used by the ranch hands to stand on and reach over the fence and into the chute to slap the rear end of a cow to get them moving..


The instructions (and other builders) suggest painting the pieces with acrylics using dry brushing and other methods.  I could see that there was some grain in the wood and I didn't want to cover that up. Also, I didn't want the fence to look like it had a layer of paint on it. I'm sure other folks are better at painting than I am, but I really wanted to preserve the grain and the scale of the piece.  So I used a staining pen.  The staining looks a lot more even in the photos than it does in person.  But some of that unevenness will be dealt with using chalks to create dust.

One thing I've alluded to earlier are the open gates on the ramps.  The kit comes with the front of them ramp lasered in one piece; the gates can be seen, but they won't open.  To get them to open you need to cut very carefully down both outer sides of the gate inside the frame.  You're left with a loose gate and a very, very delicate frame. Doing this, though, allows for a more realistic situation where a cow is on the ramp and stepping into the dispatch car. One of my ramp gates is open.


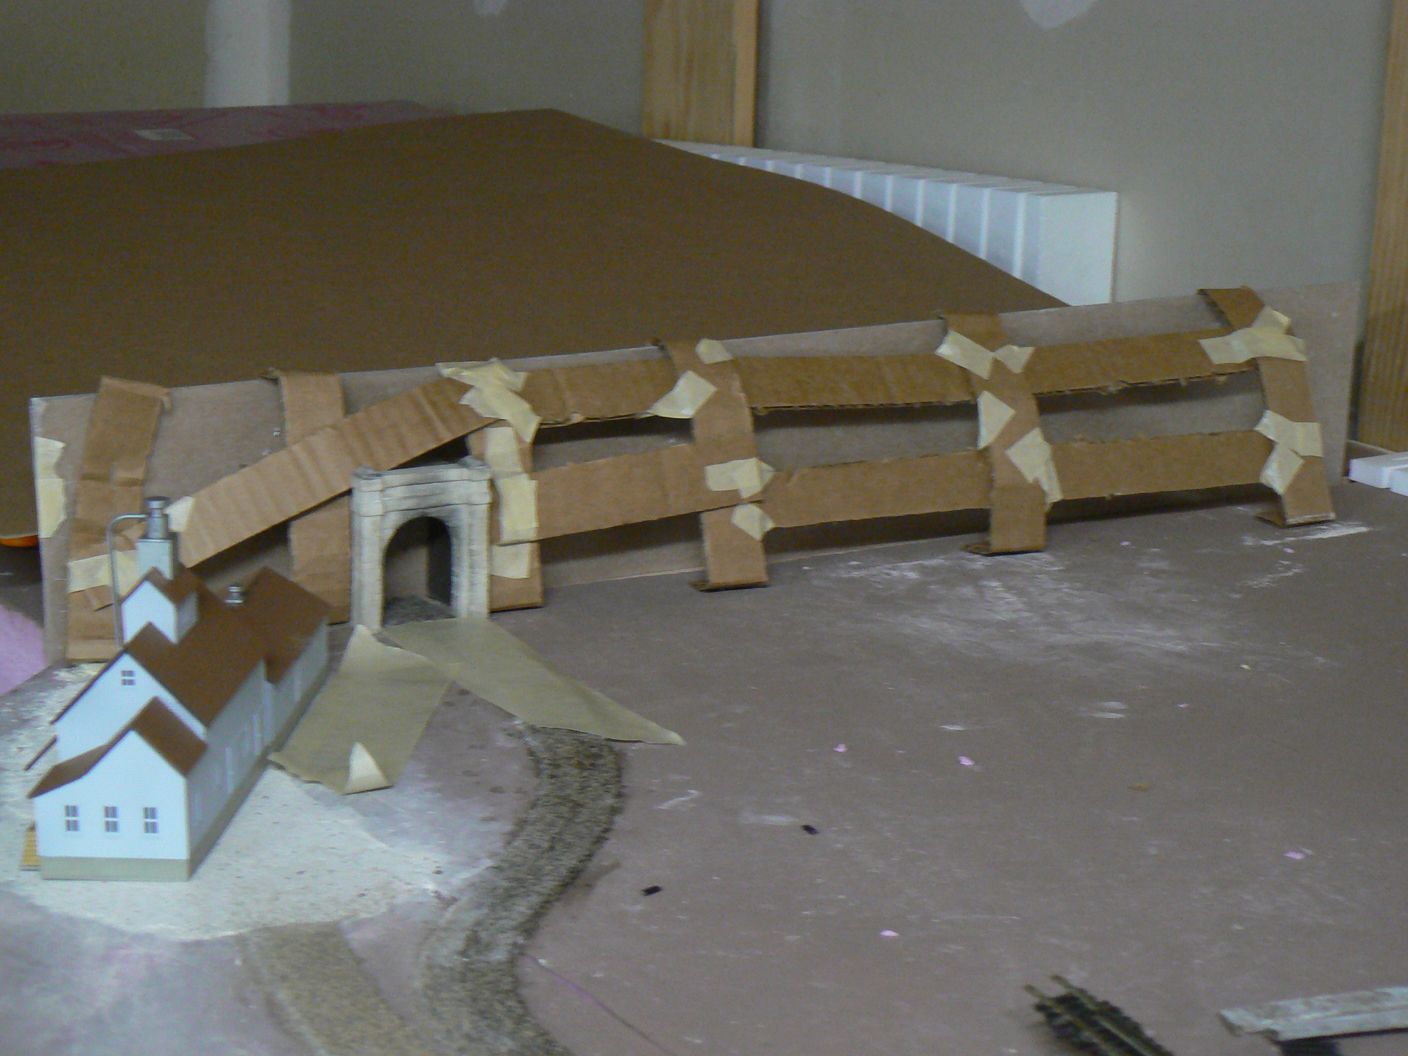
Another problem with the kit is that it does not provide for track being used, either on roadbed or flat on the ground.  You can see on this photo above of Dwayne Ward's version of the model that the foreground ramp has its front end elevated, hovering without support above the ground.  I suspect he needed to do this to get the ramp close to the level of the floor of the dispatch car.  Having seen that (and testing with my own model against non-road-bedded track) I realized that the model in fact does not take into account using track.  I used a scrap piece of wood from the model kit and glued it to the base of my ramps.  It won't be enough height, though, so I'll have to put the entire model on a base to give it more height against the rail.

Ultimately, I'm pleased with the finished product (or what will be the finished product). I've got a classic-looking stock yard that works. With strategically-placed cows and cowhands it should look like a working ranch.  Unfortunately, neither Woodland Scenics nor Preiser make horse-riding-cowboys in N Scale.  I'll have to improvise with some of the other horse-riding figures and workers and lots of bales of hay.

Saturday, August 17, 2013

The Grass IS Greener!

After I finally got back to the layout, I decided I'd keep the hills for a little while at least, even though I wasn't happy with them.  Every video I saw showed people making nice smooth hills and having no problems getting their Hydrocal-soaked paper towels to lie flat and fairly smooth.  That's not what happened to me.  They looked too craggy and paper folds had created odd shapes, and my attempts to smooth the plaster had only left me with whipped cream-like points that hardened far too quickly.

But instead of tearing them out I made a wash out of Woodland Scenics stone gray coloring and brushed the hills with it.  Immediately, the hills took on a new look and a new life.  They weren't perfect: some areas were lighter than others; some got too dark.  But overall it left me with something to work with.


I started by using earth tone chalks, applying to certain areas that I thought would color nicely. Using a short, stiff brush, I worked in several colors in a number of areas before I realized I could spend a week on just chalking the module, and then when I added ground cover the chalked areas would get covered up..

You may notice something in the photos in this posting.  It being the middle of summer with temperatures in the high 80s, low 90s, I switched out my extremely warm halogen lights with two huge curlicue CFL bulbs.  They throw a yellowish light, but they do have a large 4200 lumens each (when compared to other CFL bulbs).  And they throw off very little heat.  Much easier to work in the garage during the summer with those bulbs.  I'll save the halogen for the winter.


So I switched to ground foam.  I used the standard method of spraying Scenic Cement and sprinkling green ground foam onto the hills.  I used a couple of colors, then added bushes a couple of places.  You can see a fair amount of detail in this shot.


In this image (above) you can see the multiple colors of grass.  One section of the hills (the right side) was too steep to take any grass.  This I colored with a couple of chalks.  You also can see the cardboard cutout of the base of a gravel road I'll be adding a little later.  It is crossed by a track (placed only for visualization) that will hold stock cars.


This next photo shows two tunnels: a two-track concrete and stone and a concrete two-lane automobile tunnel.  I used old concrete acrylic for the top portion of the train tunnel and several layers of various colored chalks for the stone portion.  I used concrete acrylic for the auto tunnel.  You can see some areas that need fixing.  There is also a concrete road along the right edge of the photo that crosses the entire width of the module.


This shot shows the other side of the module.  You can see a lot of detail here: the grass, bushes on top of the portal, chalked portions of the hill.  Much more to do, but it's a real good start.

But before I can go any further I have to build a stock yard, which will be on the other side of the switch that you see in the foreground.  It's a complex laser-cut kit that I have to kitbash to get it to look like the stock yard I envision.  So it's going to take some time before my next posting.

Monday, August 5, 2013

Hydrocal Ain't As Easy As I Remembered!

So, I have my cardboard webbing set up to build a geographic feature. I mix up some Hydrocal per instruction.  I dip paper towels.  And I place the paper towels on the cardboard webbing.  It's a little frustrating; the Hydrocal is too thick and it's seizing up very quickly.  When I'm done I leave it alone for a few hours.  Returning I find that the paper towels are still wet and the Hydrocal is crumbly and sandy.

Angry with myself I tore out the whole wall, mushy cardboard webbing and all.  I built a new web and tried again, this time making the mixture less thick to start with.  Still, it seized up very quickly, wouldn't harden, and became crumbly.  Luckily, I had put only a few Hydrocal-soaked towels onto the webbing as a test of the new batch, not wanting to risk losing more time and cardboard.

A visit to my friendly hobby store cleared up my confusion.  Hydrocal goes bad.  Well .. duh!  Should have figured that out myself.

By the way, don't use those tri-fold industrial paper towels I mentioned in an earlier entry.  These just fell apart on me.  I quickly grabbed a roll of kitchen paper towels and these were a lot stronger.

The next problem I ran up against is making it generally smooth.  My hills are somewhat steep, but I didn't think that would cause much of a problem.  Regardless, what I ended up with were very craggy hills.


You can tell in this shot (above) how steep I made the hills, wanting to conserve as much space as I could for the cattle ranch I plan for this module.  You also may be able to see some of the relief in the photo.


This shot shows how I turned the corner (background) and you can see some of the cardboard lattice work.  The piece of cardboard in the foreground is coated with wax paper so that the Hydrocal will not stick to the cardboard.  When finished, I'll remove the staples holding that section and pull it away.  This will expose the inside of the hill, but that should not be a problem since the modules on each side will have similar hills of that will create the appearance of a complete hill.  Of course the hill actually will be split so that the modules can .....


...... lift up or down to make access easier during the build, and store away up high if necessary (note module 3 four feet further up the rails than the other modules).

You also can see in the previous photo on the right a section of articulated styrofoam.  This is where the mainline will go, unseen for much of the journey, around the entire layout.  I had glued the tracks down but had screwed up with the wiring so I had to tear up the tracks and re-string the wires.

To be honest, I didn't think the hills looked that great, and so I put the project aside for a month while I did other things.  When I got back to it, I decided that I would color the hills first just to see if I could make them work.  Didn't want to tear out the entire thing, after all.  That's when things began to change.

More next time.


Friday, May 10, 2013

Electricity Is the Bane of My Existence

My plan was to start putting up the hills around my first module.  I explain in previous posts about styling my pike on N-Trak principles and how the hills help to visually separate one module from the next.  But as I started to put up the first length of hills along the left edge of the module I realized something.  Before I could go any further I would have to hook up electrical connections to the two tracks at the back of the module.  I planned on hiding these tracks --  which would be Great Northern mainlines that circle above the multi-module valley I'm building -- and before I could close them off I had to do some soldering.

Of course I had done everything backwards.  I had glued down the prefabricated Woodland Scenics Styrofoam riser that I had bought from my local shop.  Then I glued down the track.  Then drilled holes for the wires.  I did all of this by stretching myself over the module to reach back across the 38 inch spread of the model.  Very uncomfortable, and very difficult to maintain my position on a step stool.  Add to that, I had stupidly forgotten to remove some of the ties so that I wouldn't melt them when I soldered the wires to the track.  What a mess.

But ... I finally finished it.

Then I had to connect the tracks to a pair of feeders.

N-Trak uses a main electrical feed that passes through all of the modules.  Because the modules are often not made by the same people, or may not be included in a layout at a show, each module must have connections at either end rather than simply running a wire through all the modules.  The N-Trak handbook calls for specific connectors, but I couldn't find them.  I tried Home Depot, Ace, a local store that sells only electrical needs, and Radio Shack.  The manual suggests certain Radio Shack parts.  Well, the guys at RS had no clue.  And HD and Ace only sell the most basic pieces.  So I had to spend a couple of hours figuring out replacements.  This wasn't easy.  I don't like electricity.  I don't understand it.  But with a little help from a guy at the local electric parts store I was able to put together something that should work.

Some years ago I went to workshops at the hobby shop that taught me about most facets of the model train hobby.  When it came to the electrical workshop, I was lost.  These guys showed me how to make all kinds of connections, how to design wiring plans, and lots of other stuff.  The thing that really caused me concern was looking under their layouts.  These guys had wires everywhere.  They were color coded and bundled, but there didn't seem to be a plan in the madness.  It was all easy for them to understand, but I was confused.

That had a great affect on me.  I realized I couldn't do everything these guys had done.  I couldn't electrify everything.  I had to make choices.  So, for now, I'm just supplying electricity to the tracks.  No motorized switches, no crossing gates, no building lights.  Just the basics.  Only what makes the choo-choo go around.


Also, I just cannot work underneath the layout.  My back won't allow me.  So I put a couple of terminal blocks in at the front of the module, just under the 8-inch front extension.  It ain't pretty but it works.  And when I'm finished, I'll put in a fascia board to hide the mess below.  And the great part?  It actually works!  I tested it and the house didn't burn down!

Sunday, April 7, 2013

Tectonic Movement ....

At the core of it, my layout is basically N-Trak.  I've modified the N-Trak ideals to fit my needs, of course, and I'm sure N-Trak.org would be appalled with what I've done.  But it fits my situation.  With N-Trak, although you are creating separate dioramas that are put together to build a complete layout, you really have often wildly disconnected scenes.  You can have a mountain in one module right next to another module that has an oceanside pier.  Or a city that ends abruptly next to a farm.  All of it is at the whim of the club members who choose their own module designs, and then the uncertainty of who will decide to attend which show.

I wasn't making all of this as part of a club; it's just for me.  So I wanted to do something different with the transitions.  Usually, N-Trak units have fiber board or hard board walls on the sides of their modules.  These are painted with images that mesh with the module's design:  low hills and blue skies for a farm module; a city-scape for a downtown layout.  While this works, I don't really like it for my design.  First, I'm no painter.  I used an airbrush fairly well recently, but my artwork would be fit quite nicely in a second grade classroom.  Second, I wanted to integrate the transitions into the scene a little more than N-Trak usually does.

My solution is to create low hills between the scenes.  Each of these will reflect the geographic structure of the area I'm trying to depict, and will have unique features: water falls, rock formations, timbered hills, and the like.  This might require a bit more work (especially with Hydrocal!), but I believe that visually it will be more pleasing.


In the picture above you see the cardboard webbing that will support the Hydrocal-soaked paper towels to form the hill.  This is the left side of Module 2.  It's a ranching scene with cattle pens.  There is also a highway (or what used to be called a highway before Eisenhower started up the super highway program in the '50s), a feed mill, and a mainline that breaks off into two tracks, along with two separate turnouts; one for the cattle pens and one for the feed mill.  I'm going to have a farm road, too, that will cross the tracks to reach the highway.

The webbing is connected to a cardboard wall at the very left edge of the module that will be removed once the Hydrocal is dry and hard.  Adding some degree of difficulty is the railroad tunnel that will provide access from this module to the next.  This is a major point in the building of this layout.  I've been thinking about creating this large layout in my garage for years.  I've planned out most of it, right down to some of the smallest details.  For many reasons I haven't been able to work on it very much, and when I could it took a lot of time to work out a number of problems and build the base.  Gluing some cork or building and painting a model is one thing.  This geographic structure -- to me, at least -- is something much bigger.  It's a signal that I'm really going forward with the project.  And that's a little scary.

You probably can see that I glued the cork roadbed.  I did some sanding of the roadbed as it meets up with the Mold-a-Scene patch underneath the feed mill.  I had to use a plastic shim (slightly sanded) to bridge the gap between the end of the sanded cork and the beginning of the trough (which is covered by the wide piece of masking tape.


Another bit of detailing I did was with the tunnel entrance.  I wanted it to retain it's stone look and texture while giving it an old, dirty look.  This is a portal I've had for a while, and over the years it accumulated a lot of dust and dirt.  That was good.  But I needed to give it a light stoney gray color.  After some fits and starts, I decided to color some water with about half a teaspoon of stone coloring from Woodland Scenics and then soak the portal for a few minutes.  The end result wasn't bad, maybe not as dark as I would have liked.  Guess I needed some more of the stone coloring.  To fix this I used some chalks to color parts of the portal to give it a sooty look, as if years of steam engine passage had darkened portions of the arch.  This picture may not be the best representation of it.  I haven't figured out how to manage the macro setting with aperture control.

Next, I raise mountains ....

Tuesday, April 2, 2013

Some Detailing ...

So, with the trough made and the hole cut into the foam I had to deal with the track.  Below you can see that I cut out most of the ties between the rails of the track that would service the trough.  This is a 5-inch straight from Atlas.  I tried doing the same thing with a piece of Peco track and the whole thing fell apart.  You can see that the Atlas ties stay in position even after the center portion of the ties are removed.  Peco couldn't do that.  The straight fits as close to perfect as I can get it, sitting on top of the trough which will be inserted into the cut out in the foam.  Later I painted the foam in the trough with a heavy coat of raw umber and then used some of the dust created by sanding down the Mold-a-Scene to coat the bottom of the painted trough, as if with grain to be milled.  Frankly, I don't think anyone (other than me) is going to see that, but I like that bit of detailing.


With that settled, it was time to work on the mill.

Again, this is the Walthers Sunrise Feed Mill kit in N Scale.  I'm not a great model builder, and I've been having some problems with these kits lately.  What I discovered -- besides my bad eyesight and the fact that I have 10 thumbs -- I don't really like those instant glues; the cyanoacrylate (CA) glues.  They just run like crazy on me and they smudge windows.  So I've really limited my use of such glues.  Instead I've been using Testor's model cement.  This requires that you hold the pieces together for half a minute.  But the glue stays where you place it.  And even after it has set for a while you still have a little wiggle room to square up the model if needed.  Of course the Testor's only works on plastic, so I keep a bottle of CA around for other projects.

While the model was now easy enough to put together, I was disappointed in it.  I don't think a lot of care went into its production, at least for N Scale.  The picture on the box shows supports for the dock roof, but the model does not include any.  Nor are the pictured drain spouts, ladders, and other small building details included.  The chimney is pictured as brick, but the actual piece of plastic is not molded in a brick design; in fact the sides are kind of concave rather than square.


Now, of course, I can add the details with scratch pieces, and I probably will (most of them, at any rate).  And I'll paint the chimney so it's concrete and not brick because it just will be easier, and it fits the type of structure, too.  But the warehouse doors are not made to open, which is really restrictive when putting together a scene.  Someone much better than me could, no doubt, cut those doors away from the model and put other ones in that slide.  I don't have that level of skill.  Another problem was that the model actual broke as I was holding a couple of pieces together as the glue dried.  You can see a crack where I had to glue the wall pieces back together just under the unsliding warehouse door in the concrete base.  I really wasn't squeezing that hard.

For the first time I used an airbrush.  Couple of problems occurred but all-in-all it turned out fairly well.  I've got some mistakes to take care of, some little places I missed, and then some weathering to do.  The model should be ready by the time I'm ready to set it in place.

Before that, though, come the hill building and then the cattle pen projects.

More on that soon ...

Friday, March 15, 2013

Just Had to Make It Harder ....

When using the Sunrise Feed Mill base (2 pieces) to position the industry track I made one discovery and had one crazy idea.

The discovery was that the foam pieces on Module 2 were not as level as I had originally thought.  There was a slight dip from the main section to the extension.  Of course, I had to fix that.  So I took out my Mold-a-Scene and mixed up a small batch and troweled it onto the uneven surface.  It was really crumbly, even after I added a tablespoon or so of extra water.  After working with it for a while I got it into the shape that I needed.


You can see some of the Mold-a-Scene under the base of the model after I sanded it down.

One thing I learned about Mold-a-Scene (that even my guys at the hobby shop couldn't be sure of) is that it will adhere to foam.  But it takes a long time to dry.  Five days.  Of course I'm building this in my garage and it's winter and it's the Northwest so it is cold and damp.  But 5 days?  Well, at least it dried and it sanded well.

Then the crazy idea hit.  Feed mills like this take delivery from bulk carriers, like a car-load of corn or something like that.  Then the corn is taken by the feed mill and ground and bagged.  So how do they get that corn or whatever?  Hoppers pull up and dump their load into a trough, which leads to the mill underground.

You can see the trough being cut out of the foam.  I used a small, flat-bladed wood cutting knife I had, taped up at a place above the point of the knife so that each incision I made would be the same depth.

I'm sure there's a company out there that makes a trough that I could use but I didn't want to go looking for it.  I wanted it right now.  So I built one on my own using plastic dock parts from Walther's foundation and loading dock parts kit.  The difficult part was cutting the narrow sides to the right length.  It seemed that in the prototype the rails would need to sit on the long edges of the trough in order to support the rails.  And as we know prototypical rails are 4-feet-eight-inches apart.  That's fairly narrow in N Scale.

You can see the the finished unpainted model in the photo above and below.


There's more to do on the trough ....